New Sales Invoice
You can create a new sales invoice by clicking the + New Invoice button on the main Sales Ledger page. This will open the New Sales Invoice screen.
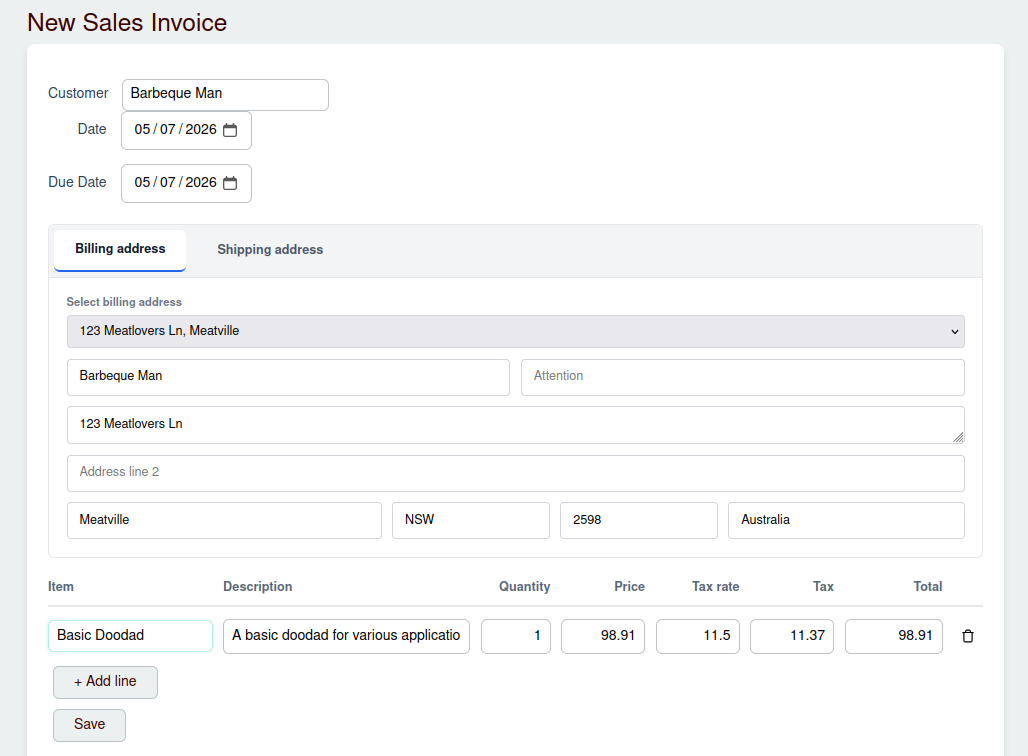
Invoice Header
The top section of the form contains the primary details for the invoice:
- Customer: Use the search box to find and select the customer for this invoice.
- Invoice Date: The date the sales invoice is issued.
- Due Date: The date by which payment is expected.
Billing and Shipping Addresses
Once a customer is selected, an address section appears with two tabs: Billing Address and Shipping Address.
- Select Address Dropdown: Allows you to quickly populate the address fields with any predefined addresses stored for that customer.
- Address Fields: You can manually override the address details (Name, Attention, Address lines, City, State/Province/Region, Postal Code, Country) if a custom billing or shipping location is required for the invoice.
Invoice Lines
Below the address section is the invoice items list. For each line item, you need to configure:
- Item: Search for and select catalog items using the progressive search box.
- Description: Displays the selected catalog item's description (automatically populated and read-only).
- Quantity: The number of units being sold.
- Price: The unit price of the item (pre-populated from the catalog but adjustable).
- Tax Rate: The tax rate associated with the item's tax category (automatically populated and read-only).
- Tax: The calculated tax amount for the line item.
- Total: The net total amount for the line item before tax (calculated as Quantity × Price).
You can manage lines using the following controls:
- + Add line: Add a new empty row to the invoice.
- Delete Button (Trash Icon): Removes the selected row from the invoice.
Saving the Invoice
Click the Save button at the bottom of the page to submit the invoice. Once saved successfully, a confirmation message will be shown, and the generated invoice number will be displayed at the top of the form.